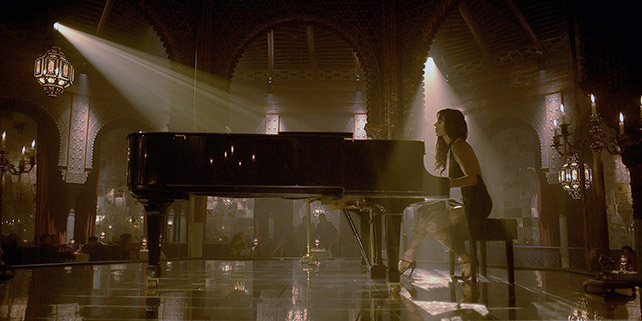
With the advent of digital cinematography, many stills photographers are beginning to explore the possibilities of motion capture. Although the fundamentals remain similar, other aspects are likely unfamiliar. This article gives an overview of the key differences in order to make the "cinephotography" transition as straightforward as possible.
OVERVIEW
Although motion capture is ultimately just a steady stream of stills, how one thinks about exposure, equipment and workflow all require reorientation. Storage requirements are higher, exposure is linked to the frame rate, and image editing needs to consider the entirety of a clip, for example. In exchange, one gains a whole new creative dimension: time. Where one could previously show a moment, now one can depict an extended story.
The terminology is also different, in part because of the more recent roots in film. For example, color editing is referred to as "grading," quick-turnaround imagery is referred to as "dailies," manually focusing is called "pulling focus," and a single image is referred to as a "frame" or a "still," amongst other differences. This article focuses more on introducing high-level concepts than language though, and links to related tutorials are also provided if a closer look is needed.
SHUTTER ANGLE
The concept of a shutter angle is perhaps the most fundamental yet unfamiliar for stills photographers. In a nutshell, it describes shutter speed relative to the frame rate, and is important because it controls the extent to which motion blur in successive frames blends together. At one extreme, a shutter angle of 360° means the shutter speed is as slow as possible, and is equal to the frame rate. Then, as the shutter speed is increased, the shutter angle becomes progressively smaller.


The key is that unlike with many types of photography, some motion blur is often desirable with video, since this helps smooth the difference between otherwise discrete frames. See the tutorial on shutter angles & creative control for example videos and additional diagrams.
In general, a good balance between crisp stills and smooth motion is achieved with a shutter angle near 180 degrees, which equates to a shutter speed near 1/50 of a second at 24 fps. Most cinematography is therefore captured near this shutter speed. Although this simplifies camera settings, it has several consequences for lighting and exposure...
LIGHTING & EXPOSURE
With stills, one typically adjusts the camera settings to fit the lighting, whereas with video, one typically adjusts the lighting to fit the desired camera settings. A big reason for this is because with video, exposure is ordinarily controlled using only ISO and lens aperture. Imagine the necessary lighting and types of photography that were possible at 1/50 second, and that's likely close to what you'll have to work with when shooting standard video.
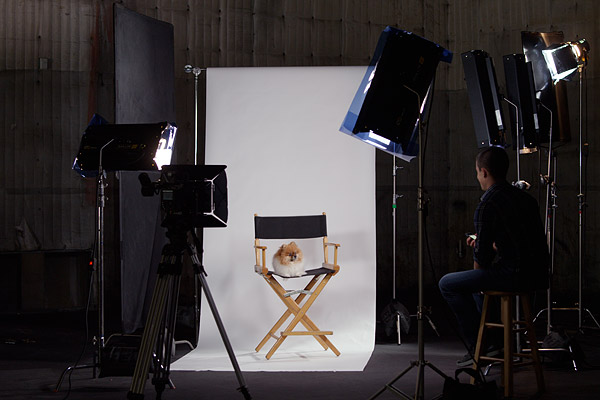
Any exposure shortfall is then offset using higher intensity, continuous lighting. For many, this is unfamiliar territory strobes and flash are no longer the universal lighting tools they were with photography. Since creating a bright pulse is much easier than sustaining this continuously, lighting requirements often increase substantially. However, once the necessary equipment is in place, most photographers actually find video lighting to be easier, since subjects are visualized under the same illumination as they'll be captured.
Exposure strategy also has to adapt. Whereas still capture usually needs perfect lighting at a single moment, motion capture has to consider how lighting will vary over the duration of subject and camera movement. Using the stills photographer's strategy of "expose to the right" therefore runs a high risk of overexposure. With video, instead leaving spare latitude above the highlights will help safeguard against clipping. See the tutorial on exposure strategy with RED cameras and in-camera exposure tools for in-depth discussions.
CINEMATIC LENSES
Sometimes photographers are confused when they encounter the term "cinematic lenses," but this quickly subsides once realizing these have all the same functionality as standard SLR lenses. The primary difference is performance: they are often larger and sturdier, have stiffer and more smoothly adjustable focus rings over a wider range of motion, and are typically sharper wide open. Their aperture also isn't restricted to discrete values, and is instead controlled using a continuous lens ring (similar to focus or zoom with an SLR lens). In addition, most cinema lenses are strictly manual focus since cinematographers typically don't use autofocus during a recording.

The other big exception is that cinematic lenses are specified using a T-number instead of an f/number. Although both terms describe the lens aperture, each has a different emphasis. An f/number, as many photographers will be familiar, is a ratio between the lens focal length and the aperture diameter. A 100 mm lens at f/4 has an aperture diameter of 25 mm, for example. This is extremely powerful because any lens at f/4 will have equivalent depth of field, but falls short when describing exposure, since not all lenses at f/4 record the same amount of light.
The T-number solves the exposure problem, and is effectively just the f/number with a correction factor to account for light transmittance. An f/4 setting that has 50% transmission efficiency (a 1-stop reduction) will therefore be specified as T5.6, for example. When changing lenses, one therefore only needs the same T-number, and all lighting can be kept identical. The flip-side is that all T5.6 lenses won't necessarily have equivalent depth of field, but they'll usually be close enough to preserve the creative intent.
SENSOR SIZE & CROP FACTORS
Motion cameras often have a smaller sensor size than the familiar stills photography formats. This usually means a given lens will appear as if it were a longer focal length, and at the same subject magnification, that lens will also appear to have more depth of field. The magnitude of this effect depends on the "crop factor," which is a measure of the relative difference between the two sensor sizes:


With consumer video cameras, this effect can be dramatic and is often comparable to the difference between compact and digital SLR cameras. While potentially advantageous for camera size, having such a small sensor can limit the ability to depict a shallow depth of field, amongst other differences. The combined effect is that these sensors typically give video the feel of a television broadcast.
However, many high-end cameras have much larger sensors, which gives their video a more cinematic feel. These sensors are also a more natural transition for those familiar with DSLR cameras. Use the crop factor tool below to see how your particular RED® camera settings and lens will behave compared to 35 mm photography.
Video may also influence how one thinks about composition, since standard video formats have higher aspect ratios than with photography. DSLR cameras usually have a 3:2 (1.5:1) ratio between their longest and shortest dimension, for example, whereas modern video is often displayed at a ratio of 16:9 (1.78:1) or higher. Video is also virtually always captured in landscape orientation.
EDITING & GRADING
For those used to DSLR cameras, motion cameras with a RAW workflow will be comfortably familiar. Most even say it's easier to make the transition to digital video from a DSLR than it is from motion film capture. See the tutorials on Intro to Grading with REDCINE-X® and RMD Files and Non-Destructive Editing for a detailed discussion of how this works with RED cameras.
One big difference is that with video, "editing" ordinarily refers to the process of cutting and compiling various clips into a narrative. This is perhaps the most alien aspect for photographers, but thankfully it's also a process that has been relatively unchanged over the past decade. As a result, a vast online knowledgebase has accrued, and numerous mature software options are available.
The familiar "editing" stage with photography is instead called "grading" with motion. At its core, this process remains almost identical all the familiar image editing tools are still applied using a single representative video frame. The rest of a clip is ordinarily scanned only to ensure that the grading continues to look as intended if subjects or lighting change. A minor difference is that with video, one usually needs to stick with global editing tools, such as curves, levels, white balance and saturation. Local adjustments, such as the equivalent of dodging, burning, cloning and healing brushes, can easily break frame-to-frame continuity, and should therefore be reserved for only advanced edits.
OTHER CONSIDERATIONS
Tripods. A steady tripod is more important than ever even under bright light. Fast shutter speeds alone no longer hide camera motion, because unlike with photography, one also has to worry about frame to frame displacements.
Follow Focus. Many cinematographers use a "follow focus" device to make focusing smoother and easier. This attaches to a lens's manual focus ring, and provides a more ergonomic focus dial on the side of a camera. It also reduces the likelihood of inadvertently moving the camera during focus.
Camera Movements. These are a creative tool unique to motion capture. Panning, tilting, tracking and following are common movements that can enhance the emotional impact of a clip, and make otherwise static scenes appear dynamic. Dollies, jibs and steadicams are a few of the tools that can make these movements as smooth as possible.
RELATED TOPICS
- For a background on editing, see the tutorials on Intro to Grading with REDCINE-X and RMD Files & Non-Destructive Editing.
- To learn more about shutter speed with video, see the tutorial on Shutter Angles & Creative Control.
- To learn more about creative frame rates, see High Frame Rate Playback.